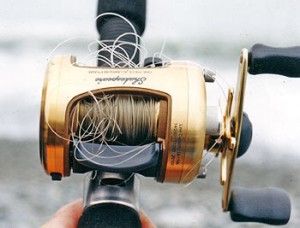
 I always take a baitcasting outfit with me whenever I go fishing and our last trip for trout was no different. Even when the weather is bad I like to take a new bait or two with me so that I can use it and spend some time trying to figure out the best retrieve for coaxing fish to bite and for testing a new lure in varying conditions. This is the long way around getting to my point.
I did the same and got into a discussion with a friend of mine who is thinking about getting his first baitcasting reel but isn’t at all comfortable with using one or even how to set one up for the first time. After going over how to do it with him I figured that there are probably plenty of folks who are in his same situation and will be getting their first casting reel soon.
With that in mind, I am going to go over a simple but effective way for you to adjust any casting reel whether it or you are new to this kind of equipment.
Control The Baitcasting Spool
To begin with, casting reels have two or more ways to control the speed of the spool. On the handle side, there is a knob under the handle that is the spool tension knob. It applies pressure to the spool and will limit the spools maximum rpm’s. On the opposite side of the handle is some other form of braking, usually centrifugal or magnetic.
Some require detaching the side plate and others are adjustable without having to remove the side plate. I like to begin on this side of my reel and turn that brake off completely. Then I go to the spool tension knob and crank it down pretty good to initially put a lot of pressure on the spool.
After the reel is spooled with line, attached to a rod and you have a lure tied on, then you hold the rod tip at about 10:30, push the thumb release and let the lure go until it hits the ground. You have to be careful and watch its speed because with today’s reels, this could give you your first backlash. Keep doing this and putting more and more pressure on the spool tension knob until you can let the lure drop, hit the ground and the spool stops when the lure hits the ground. All of this is done without using the secondary braking.
The Secondary Breaking System
Once the reel is adjusted with this much tension then apply the secondary braking starting with a high setting or even the maximum until you get used to it. With the spool tension knob and the secondary brakes adjusted like this, take your first cast. It probably will not go all that far but it will do so without a back lash.
Now you can begin to fine tune your cast control adjustments. Generally, I like to back off on the secondary braking first. Just a little bit followed by decreasing the pressure on the spool tension knob, again, just a little bit. Keep doing this until you are comfortable with using a casting reel and in time you will find yourself really winging it out there when you need to. Remember, every time you change lures, it’s a good idea to repeat this process to avoid backlashes from changes in weight.
One Last Hint
Here is one other little hint for those who are completely new to casting gear. The release point for letting go of your line with a baitcaster is very different then with spinning gear. The easiest way to make the transition is to start with side-arm casts and slowly elevate the rods path to overhand. I have seen a lot of birds-nests from a lure being slam dunked into the water by people unfamiliar with casting gear.
Take your time and enjoy the process of learning to use your equipment. Part of the fun of fishing is mastering casting distance and accuracy. After all, let’s face it, the better you are at something, the more enjoyable it tends to be.
[…] off and the local lake had just been stocked the day before and since he had no idea how to use baitcasting gear, using light spinning gear for panfish just seemed to be the […]