Featured Reviews

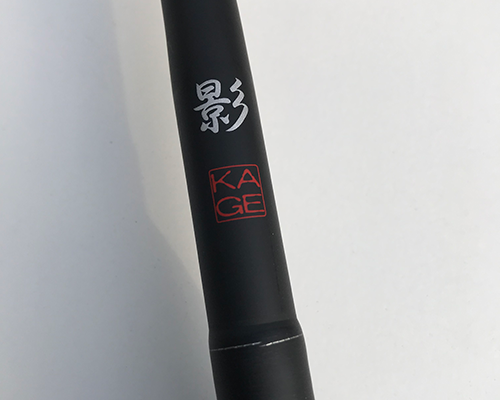
One component of fishing that can make a huge difference in everything from angler fatigue to hook up ratio, having the ability to present a bait properly, casting distance and accuracy as well as myriad other concerns is a good, balanced rod. Yes, the stick you’re using can, depending on which one you’re throwing, either… [Continue Reading]

Daiwa Kage Rod Review

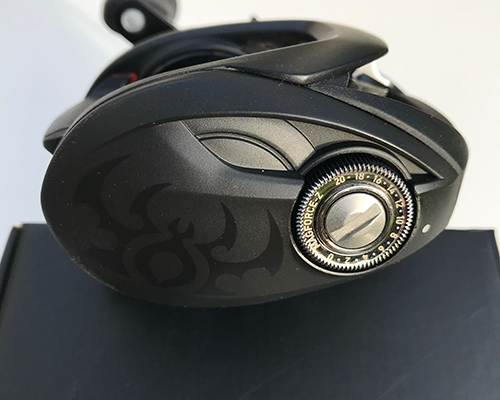
Daiwa introduced their Tatula series of reels several years ago beginning with the original Tatula 100 and 100 Type R. We’ve had every major version update since then including the CT Type R and the SV. We obtained the new Tatula 100 some time last year and have been fishing with it ever since.

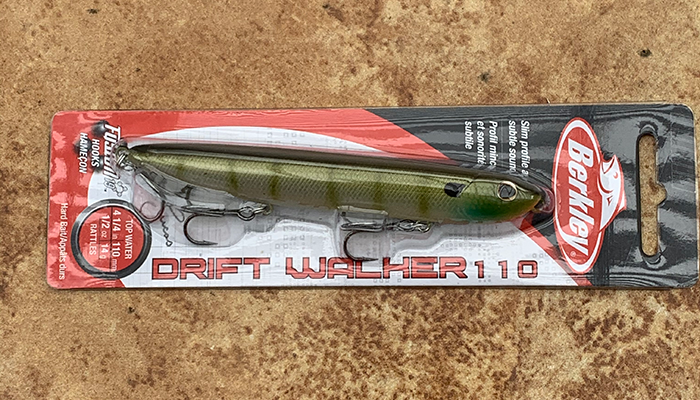
There are times when big topwater walking baits are key to getting bites while other situations may call for something a little less boisterous. One bait that you can use that still has a decent length to it but presents itself with more subtlety is the Berkley Drift Walker. This bait comes in ten colors… [Continue Reading]

Hags Tornado F 6.5

Hag's Tornado F6.5

There are times during the year when the use of larger than normal worms will produce more strikes and bigger fish for you. Although fall is typically the season for faster moving baits, that doesn’t mean that on those slow days, you can’t catch them on worms. If you’ve never tried a larger version of these soft plastic bass catchers, now might be a great time to have your first experience with them. The one that I have grown very fond of lately is the Hag’s Tornado in the F6.5 inch version.

Like its smaller sibling, the F6.5 has the same scent, ribs, floating tail and rattle chamber, but in a larger profile. Why would you want to go with this? Because often bass will pass up a smaller offering in favor of a larger one knowing they have to fatten up for the winter. Given they would need to expend the same amount of energy to eat either one, bass, especially bigger bass, may tend to eat the larger bait. Yeah, the old saying, “big baits catch big bass” can be right on.

One of the things that you’ll need to consider when throwing the Hag’s F6.5 is your choice of rigging options as well as the size of the terminal tackle involved. For me, I don’t throw this worm on anything less than a 5/0 hook with my first choice being the Dirty Jigs Stand Up Finesse Head in 3/16. This shakey head brings out the very best in the F6.5 Tornado.

Rigged with this head, the worm will stand almost vertically off the bottom of the lake and every tiny twitch will make the tail come alive. For that matter, just current will have the worm quivering. This subtle action is what I’ve grown so fond of in the Tornado.

I like to fish this bait on either spinning or casting gear with no more than 10 pound test. In our experience with this worm, we got most of our strikes after allowing the Tornado to come to rest on the bottom and then crawling it up and down opposing sides of points. Using short pulls of the rod tip and then just shaking the lure in place for several seconds before moving it a little more was the most effective.

Big Baits, Big Fish!

You can rig it senko style, wacky style or just Texas rigged on an offset worm hook with a standard worm weight too. We’ve caught fish using all of these methods. But if I had to narrow it down to using only one, it would definitely be on a shakey head. Usually when you get a strike on the F6.5, the take is more toward the subtle side. I like to reel down and pause an extra half beat before setting the hook. This allows the fish to get the whole worm in its mouth prior to getting stuck.

You can use a standard worm rattle with the Tornado F6.5 and because of it’s larger size, the rattle will not affect its tail action as much as it does on the smaller version. The color patterns are the same for the 6.5 as they are for the F5 and as we discussed in our earlier review, there are colors that will fit almost any color of water you may be fishing.

We talk a lot about fishing with baits that you have confidence in and this is one of those for us. If you don’t care for fishing worms on shakey heads, maybe you just haven’t found the right one to match your style. The Hag’s Tornado F6.5 may be the one you’ve been looking for.

Hag's Tornado F 6.5
Overall Ratingwww.dyerware.comwww.dyerware.comwww.dyerware.comwww.dyerware.comwww.dyerware.com
Yeah it's big, and big bass love it!

See ya’ on the water …
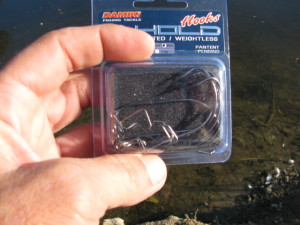
Damiki D Hold Unweighted Hooks

Damiki D Hold Hooks

At ICAST 2011, new terminal tackle was being shown everywhere. We decided to pick up a new product from Damiki called the D-Hold Hook. These are offered in both weighted and unweighted versions as well as several sizes in both versions. The first one we obtained was the unweighted in 5/0 to do duty for senko style baits, soft-plastic jerkbaits and other lures like craws, worms and lizards to see how they would perform with these proven standards.

One caveat here, we knew that it wouldn’t provide the same flexibility as a standard EWG when it comes to soft plastics and that you cannot cover your knot with your bait using a product like this. But there are enough applications that hook variations similar to this have found a permanent home in my tackle box and if a new product comes out that would be superior to the ones I currently depend on, it would be silly not to consider it.

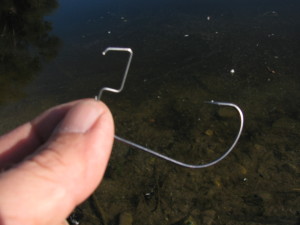
The D-Hold Hooks use a piece of wire that is attached to the hook eye that resembles a lower-case, open backed, letter d. The idea being that you thread the head of the bait onto this piece of wire, being very conscious to limit the angle and depth of the plastic that you penetrate, and then onto the hook. The way the keeper is attached to the hook eye is akin to a fast-snap which leaves some of the wire sticking out and pointing to the far end of the wire.

Due to this design, you have to be careful to avoid going through more than about 1/4 inch of plastic on the head. The bait keeper will both interfere with, and have to penetrate the head of the bait. You cannot thread a bait on, in the same fashion as using a standard EWG.

The hook point is sharp, the barb is adequately sized but because of the keeper, the hook seems to be oversized when you put a bait on it. It just didn’t matter what lure we tried, the D-Hold always wound up with the hook point further down the body of the bait than other hook styles in the same size.

Notice the strange design of the keeper

The keeper is effective for holding the bait in place. However, if you’re using a slimmer profile plastic, the far end of the wire will stick up through the lure which allows weeds a place to get stuck. Unfortunately, we tried to adjust the holder but when we did, then the lowest portion of the wire would hit the hook shank which tweaked the bait to one side or the other. Not a great deal but enough to be mildly annoying.

I rig a lot of soft plastics with the hook point tex-posed into the bait as I’m sure most of you do. With the D-Hold, the angle of the hook points up a few degrees. This wasn’t at all apparent until we actually started putting baits on the hooks. Personally, I don’t want my hook point sticking out of the plastic for the presentations that are supposed to be weedless. It sorta’ defeats the purpose if you can still get hung up on a bunch of stuff cause’ your hook keeps popping out of the plastic.

We tried a myriad of different baits with these hooks with varying degrees of success, most of which were what we consider sub-par. Damaki makes some high-quality, proven products. Unfortunately, this one misses the mark for us and we can’t give it a rating that it doesn’t deserve.

Damiki D Hold Unweighted Hooks
Overall Ratingwww.dyerware.comwww.dyerware.comwww.dyerware.comwww.dyerware.comwww.dyerware.com
We can't give this one a strong recommendation

See ya’ on the water …
Lucky 7: Seven Tips For Creating Your Own Luck On Your Next Fishing Trip

The “Kid” and I were discussing some of our recent fishing trips a few days ago. Inevitably, the conversation turned toward someone asking us if we had any “luck”? Now I have always believed that “luck”, is simply a meeting of opportunity and hard work.

When the two come together, you increase your chances of being successful no matter what it is that you’re pursuing. In the case of fishing, there are what I like to refer to as my “Lucky Seven” rules. I follow these each and every time I get on the water because years of trial and error have borne these out to be the most important components for having good days fishing.

1. Seasonal Patterns Of Fish Behavior

The first thing that I look at are seasonal patterns. Yes, these can vary by a few months depending on where you do your fishing but they tend to be one of those elements that are consistent no matter the location. Fish are going to spawn at some point during the calender year.

Our job as anglers is to spend the time doing the research to find out when this is going to happen in our area or the area we are going to fish. Once we know this, we can take a pretty educated guess as to when we’ll see pre and post spawn conditions as well. Knowing this information guides us in where and what to use when we get out there.

2. Fish Key Structure

Next for me is fishing key structural elements. The ones that I focus on are, points, creek channels, humps, ridges and flats. Most bodies of water have some mix of these topographical features that have historically, consistently held fish. Depending on the seasonal pattern that we’re subject to, these structural features will each, in turn, hold fish.

Now I like to zero in on water temperature and clarity. Not only will they affect what lure choices we should use but they can have an influence on the seasonal patterns by either delaying them a bit or accelerating them. All of this information is readily available either on the internet or by calling a local tackle shop ahead of the trip to see what they have recorded recently.

Just a little hint here: If you can find a tackle store that guides use, they generally will have more up to date and accurate info on the specifics water conditions. Don’t be shy about asking. More often than not, they are happy to bring you up to date.

3. Prepare For The Unexpected

Have you ever heard the old saying about the best laid plans of mice and men? Sometimes you get out there and just don’t find what you were expecting to. Hey, this is fishin’ not catchin’. Here again, preparation is the key to overcoming something unexpected. Having the ability to cover the entire water column efficiently is going to save you a lot of headaches when Murphy’s Law pops up.

We always need to have lures on hand, in different color patterns, that will serve this purpose. Once you’re keyed in on what the fish want, you may only use a couple of baits all day. But to get to this point, you have to be ready to make adjustments on the fly and a well stocked tackle box or bag is part of the antidote for rapidly changing conditions.

4. Find What The Fish Are Eating

Sometimes it’s easy to figure out what the fish are feeding on and sometimes, it’s near impossible. However, if we can feel fairly comfortable that we’ve got this one figured out, it will further narrow our lure choices. I can’t tell you how many times I’ve been on the water and had some folks come up to me asking me what I was using to catch fish. I make a habit of showing them and then asking them what they’re using.

Man, you should see how far off base some of these people are with their choice of baits. It’s no wonder they aren’t catching fish when they’re throwing something that is completely unlike anything the fish are feeding on.

5. Get The Timing Right

This one is really up to personal preference but I like the old adage, “start early and stay late”. I’m sure that there is something to all the so-lunar tables and best fishing times and other more ethereal studies. But for me, I kinda figure that the fish are going to feed at some point in the course of a day and I want to have a line in the water when that happens. Pretty simple really.  

6. Get To Know Your Water

On top of that, you can get more information about a particular body of water by spending more time on it. You may notice something after having been on the water several hours, that just wasn’t apparent when you got there. This could be the key to turning your whole day around by giving you a piece of information that you didn’t have prior.

A case in point, this summer I went night fishing and just wasn’t getting bit on top-water even though it was the perfect time of year for it. All of the sudden I saw a school of bait fish break the surface and then disappear. I immediately tied on a soft plastic jerk bait and caught a fish on my first cast! The rest of the night, all I did was was throw the jerk and would up with over a dozen fish.

7. Use Your Confidence Baits

And finally, when the going gets tough, use your confidence baits. Yes we here at MVF fish a LOT of different lures during the course of the season. But when the bite shuts down or we’re in a whole new environment, we reach for the lures that have proven they catch fish. For whatever reason, your “confidence lures” are the ones that tend to get you the most strikes because you are the most proficient with them.

Don’t minimize this part of the equation. If you know that you can use a particular bait to consistently get bites, by all means, use it!

There it is folks, our “Lucky Seven”. Just because these have been successful for us doesn’t mean that there aren’t other methods out there that may work for you. But if you tend to get a little scattered before you hit the water, narrowing things down in this way just might help you to have more fun and catch more fish.

And hey, when all else fails, you may just need to get a lucky fishing hat!

See ya’ on the water …

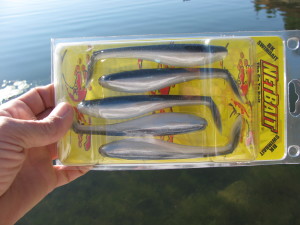
Netbait BK Swimbait 5 Inch

Bigger Bait, Bigger Bass!

We’re going to take a look at the larger version of a bait that we have reviewed before, the Netbait BK Swimbait in the 5 inch size. We use mostly the 4 inch and it has accounted for a lot of fish this year.

However, this time of year presents a wonderful opportunity to fish the bigger bait because the fish are not only getting more aggressive in preparation for the winter but they will eat larger baits in their haste to take advantage of an easy meal. These are precisely the conditions that allow a bait like this to shine.

I’ll never forget a year ago when “The Kid” and I went fishing on a brutally cold day in November on Lake Lanier. Our guide for the day was arguably the best guide on the lake and because of the conditions, his strategy evolved into using live blue back herring and fishing for Kentucky, or Spotted Bass, as they’re known.

I bring this up because the size of the bait got bigger and bigger as the day wore on. The last area we stopped to fish, he put on herring that were at least 6 inches in length. We ended up getting a double with both fish exceeding 5 pounds.

Here again, the old adage, ”big baits catch big fish”, proved to be the true. I know that there are a lot of folks who just haven’t ever tried throwing a bait like this. It simply is out of their comfort zone. But sometimes you have to be willing to throw caution to the wind to give yourself an opportunity at a new experience.

The 5 inch Netbait has all the same endearing features as its little brother. A good solid head, belly slit that makes rigging easy and of course the same over-sized paddle tail. The action is just as good with the 5 inch and the colors are the same.

I like to throw this bait using the Owner Power Lock Plus swimbait hook in the 6/0, 1/4 ounce size. I prefer the larger hook as I believe it makes for a better hook-set. I’m here to tell you that usually when you get a strike on this bait, the fish aren’t playing with you. They hit the BK  hard with every intention of eating it.

I like to fish this bait, this time of year, by casting it out, letting it sink below the level of the shad and then begin retrieving it at a medium to medium fast pace. I know that a 5 inch bait is often larger than the shad that are being chased but, there are time when I want to have some differentiation in my bait so that the fish can pick it out of the crowd.

If that isn’t working or there are no shad in the area you’re fishing, another way to use the BK is to slow roll it along the bottom adding yo-yo style hops now and again while making sure that after the hop, you once again make some bottom contact. I can’t even begin to count the number of fish that I’ve caught this way, using this lure. Due to its action, the Netbait displaces a lot of water and seems to get the attention of bass.

Just like its little brother, the 5 inch BK comes through structure like a champ. The semi-solid head deflects well off of stumps, lay-downs, stick-ups or just about any other underwater impediment. You will get strikes as the bait is bumping into and deflecting off of these kinds of cover.

Another cool thing about the Netbait product is that the 5 inch is the same price as the 4 inch. We talked about the fact that you can catch several fish on one of these baits. The first one that I used, the final tally for that bait was 22 bass before it was unusable. These swimbaits are truly an exceptional value at about $5 a pack.

Netbait BK 5 Inch Swimbait
Overall Ratingwww.dyerware.comwww.dyerware.comwww.dyerware.comwww.dyerware.comwww.dyerware.com
Great value, and even better results

See ya’ on the water …

How To Get Into Fly Fishing For Less Than $500

A while back, Pops published an article about getting into bass fishing for $200.00 (read that article here). I was very intrigued by this idea—getting people started in a great sport for a minimum initial investment. I wanted to do the same thing with fly fishing, but was a little stuck.

$200 for a good fly fishing set up was just a little too ambitious. When I started looking at equipment, and playing with the numbers though, I realized it could be done for less than $500. Fly fishing requires a few pieces of equipment that bass fishing does not, and thus the slightly higher price tag.

After figuring out that $500 was possible, I then looked back at my initial investment when a good friend introduced me to the sport. I spent over $900 on my initial investment.

When you look at it that way, $500 seems much better! So here it is, a way to get involved and learn fly fishing without breaking the bank!

Fly Rod And Reel: St. Croix Rio Santo

I have reviewed the St. Croix Rio Santo in the past. I don’t just give it my endorsement based on it’s affordable $200.00 price tag. I actually own one, and use it 30+ times per year.

When you purchase the combo, you are getting a lot for your money. Not only do you get a quality St. Croix rod and reel, but you also get backing, line, and tapered leader—along with a good travel case.

This really is a great way to get started, and will serve you on your fishing adventures for many years to come. So, our current total is $200.00.

Waders: Bass Pro Whitewater Waders

Waders are a funny thing. They can range in price from under $50, all the way up to nearly $1000.00. In fact, I have written about waders in different price ranges before (read that fly fishing waders post).

When you are just getting started, you don’t need to take out a mortgage or save up your money for months on end to get a quality product. The Bass Pro White Water Wader is a great solution for a reasonable price. At only 99.99, they fall into a very affordable end of the spectrum, yet still give you good enough quality to last several seasons of fishing.

So with the Rio Santo, and these waders, we are now up to $300.00.

Boots: Simms Freestone Wading Boot

Boots are one place I don’t pinch pennies. Since you are going to spend your entire fishing day on your feet, and usually wading in rivers, you need a pair that will be comfortable, and at the same time provide good traction on slippery rocks.

I’ve used dozens of boots over the years, and any time I’ve tried to skimp on this expense, I’ve paid for it. I’ve fallen in the water, gone home with hurt feet and crunched toes, and generally just had a great fishing trip ruined.

I now use Simms Freestone’s exclusively. At 129.99, they aren’t the cheapest out there, but where them on one trip and you will see why I feel so strongly about having great boots.

With this investment, our total is now $430.00.

Odds And Ends: Flies And Accessories

Now, we have $70 left to play with before hitting our $500.00 ceiling.

Spend that money on things like flies, tippet, and extra leader. It would be impossible for me to tell you exactly which flies to buy, because your area of the country may have different hatches than mine. Spend a little time at your local fly shop learning about what fly patterns are productive, and when they are productive.

Get a few stand by’s that seem to work every where like Wooly Buggers, Clouser Minnows, and Parachute Adams’.

Try to get flies that are not overly specialized at first—invest in flies that will work most of the time. This can be tough, but usually you will find a few patterns that work well in multiple seasons. When a fly pattern overlaps certain seasons and remains effective, this is a great fly to get.

So there you have it, follow this little guide, and you are ready to go for less than $500! If you decide to jump into fly fishing, I will definitely see you on the water!

Resources Mentioned In This Post

St. Croix Rio Santo

White Water Waders

Simms Freestone Wading Boots


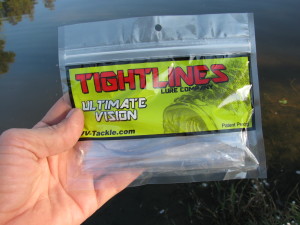
Tightlines UV Flook

Some more of the 2012 baits are starting to trickle into retail and e-tail outlets so we picked up several to see what the new offerings are like. The first one that I wanted to use was the Tightlines UV Flook. I got these in pearl-black back to match any number of baitfish. I really enjoy fishing soft plastic jerk baits this time of year and was anxious to see how these would perform against my current favorites so let’s get um’ on the water.

The premise of the UV series of baits is that bass don’t have the same filters as the human eye, therefore they respond differently to colors that we simply can’t see. These are built into the UV series with the idea that bass will be more aggressive toward a lure that features these colors over traditional baits without the UV enhancer. I really had no idea whether or not this would translate to more bites, but I had to find out for myself.

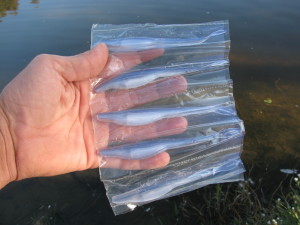
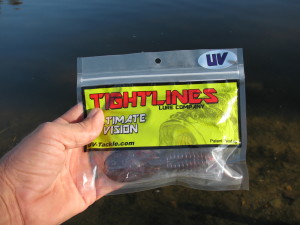
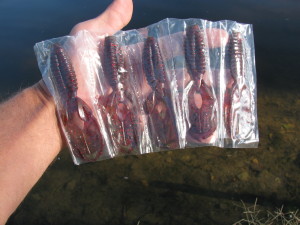
You’ll notice from the pics of the packaging that inside the outer shell, each of the baits is  individually inserted into an inner envelope of clear plastic. Whether this is to prevent the enhancer from coming off or another reason, I don’t know. However, it does make it easy to get at individual baits without fumbling around inside the bag.

One of the things that is different about this bait as opposed to other plastic jerk baits is that the belly slit on the Flook is shorter than others because the nose is longer. I usually like to throw the 5 inch versions of these lures on a 5/0 EWG but had to make a small adjustment to a 4/0 to accommodate this characteristic and not get to far into the tail section and kill the action. That proved to be a non-issue in the end but you should be aware of it.

The other factor that we ran across immediately is the fact that the Flook is more petite than most of its competitors for the same size bait. It is both somewhat thinner and weighs less than our current favorites in this genre. Due to this, we went with 8 pound versus our usual 10 pound line. Making these two adjustments, we were able to attain the same distance on our casts as with other plastic jerk baits.

The action of the UV Flook is more subdued and less frantic than most of the current crop of jerks. It still provides the side-to-side darting action but doesn’t travel quite as far or as crisply as we’re used to. The fall is angled in a moderate nose down position that is almost graceful to watch but it wants to ride up in the water column when being worked fast. This bait seems to be most competent on a moderately slow retrieve.

So how did the UV Flook do when it comes to catching fish? To begin with, almost every strike that we got we converted to fish on our thumbs. They were typical plastic jerk bait bites with most of them coming as the lure was moving, not at rest or being dead-sticked. Did it outshine our current first string? No, it hasn’t to the point that I would replace my old reliables with the Flook.

They are a little pricey for this segment considering you are getting 5 for about $5.00. They are moderately durable but not so far superior to others as to out catch them 3 or 4 to one. Does that mean that they are a bust? No, I can actually think of instances that would lend themselves to using the UV Flook over my other go-to baits such as stained water or where the bait is smaller than what I am used to. In these instances, the Tightlines product stands a good chance of outshining most of its competitors and provides a tool for those specific conditions that take advantage of it’s strengths.

Tightlines UV Flook
Overall Ratingwww.dyerware.comwww.dyerware.comwww.dyerware.comwww.dyerware.comwww.dyerware.com
Decent bait in a narrow set of conditions

See ya’ on the water …

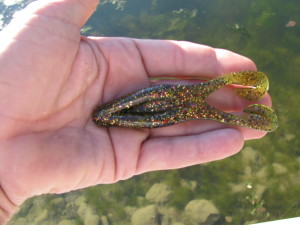
Tightlines UV Beaver Creature Bait

Since the introduction of the Sweet Beaver from Reaction Innovations, the “creature bait” has accounted for countless fish caught by the pros and the weekend warrior alike. The fact is that this style of bait catches bass. We’ve fished some Tightlines products but have not reviewed the UV-Beaver until now.

Like so many of the offerings out there in this category, the basic design is similar. A ribbed body with two small appendages at the top of the body with two larger claw like digits on top. Out of the package, they are connected and can be fished this way or separated to allow them to move independently and give the bait more action. Some use softer plastics while others use a firmer, more durable version.

The Tightlines UV-Beaver is definitely on the firm side of the spectrum. This translates to  less tearing and more fish per bait but conversely, less action from the flapping parts. Like all UV baits, the Beaver has been developed using ultraviolet colors that, the company claims, bass respond to 3- to 7-times better than traditional colors. This may account for the limited palette available for these baits. However, the basics are covered including Black/Blue, Blood and Green Red Flake.

We fished this lure on both a jig-head and a standard Texas rig to see what would be the most effective when using this bait. On a jig-head, by itself or as a trailer, proved to be the most effective. Furthermore, because there is less action from the claws on the UV-Beaver, a more subtle retrieve produced the most strikes.

Use Finesse, And Make A Few Adjustments

While there are baits in this genre that are most effective when the angler uses sharp pops and jerks of the rod-tip, this one is more of a finesse style bait. We found that using about half the energy that one would use with something that has more action from its moving parts was the sweet spot for the Tightlines.

Allowing the bait to utilize its body properly by lifting it off the bottom gently so that it glides back to rest, was the key to getting strikes on the UV. This is accomplished by using lighter weights like 1/16 to 1/8. We also found that the most effective use of this bait was in stained versus clear water or low-light conditions.

The other tweak you might consider is using a scent with this bait. We definitely got more strikes when we used our Fish Sticks Lure Enhancer in crawdad on the Beaver. While I can’t quantify the actual effect of the UV technology, there does seem to be something to it. It could be that the fish can spot this bait better than others in murkier conditions.

All of this being said, the Tightlines UV-Beaver has earned a place on the second string. It really does shine given the conditions that we mentioned above.

Tightlines UV Beaver
Overall Ratingwww.dyerware.comwww.dyerware.comwww.dyerware.comwww.dyerware.comwww.dyerware.com
When the conditions are just right, this is a good bait

See ya’ on the water …

Optimum Double Diamond Swimmer

If you’ve been with us for a while, you know that we always have a swimbait tied on when we hit the water. The reason is simple, they

Optimum Double Diamond

catch fish and can be used in lots of different conditions. We are always open to trying a new product in this category and today’s review is on one that we have been experimenting with for a while, the Optimum Baits Double Diamond Swimmer.

We chose the 3.75 inch version for our testing because it matches the size of our local forage better than the other options. This version also lends itself to more possibilities for rigging than its larger cousins.

The Double Diamond Shape

It’s called the Double Diamond because of its shape. Both from the side and top or bottom, it is an elongated diamond with a small head and narrow section just in front of the oversized paddle tail. If you’re looking for 3D eyes, you won’t find them on this bait because the design of the head doesn’t allow space for eyes.

There is a belly slit in the bottom that isn’t as deep as one that is found on a split belly swimbait for aligning your hook whether you are rigging it weightless or using it as a jig trailer. However, because it is relatively shallow, you have more plastic to go through on the hook set than with more traditional swimbaits.

Rigging The Double Diamond

We started by rigging the Optimum on a 4/0 weighted EWG to see how it would cast and what the action would be like. The paddle tail does a good job of moving water but does have a sweet spot in terms of achieving the most kicking action. This bait will stay fairly horizontal on the retrieve without rising in the water column as fast as some of its competitors.

Note the diamond profile

On the fall, the tail stops kicking but it does have a moderate nose down descent with no rolling to the side. We found in fishing the DD that a lot of our strikes occurred as we would snap the bait off the bottom and re-start our retrieve. As far as fishing it by itself, this proved to generate more strikes than any other retrieve we tried.

We also fished it as a trailer on both swim-jigs and chatter-baits. The design of this lure really lends itself to this rigging. Because of the shallow belly slit and fairly solid back, it seems to be more at home when threaded onto one of these baits so that your hook point can be exposed. We also found that it enhances the action of both of these products versus a craw style trailer in terms of the side to side kicking action.

When used like this, we only got strikes as the bait was moving. Not one occurred as the bait was sitting on the bottom. We had our best results by swimming this through stalks and lily pads. When we matched the colors of the Double Diamond to the colors of our jig skirts, we were hit more often than using either a complementary color or opposing colors.

There are a number of patterns available in the Optimum bait. They range from the subtle, more natural, to very dark as well as very bright giving you something that can be fished in almost any color water. Again, knowing the local forage should dictate which patterns you might want to try.

As far as cost goes, the Double Diamond will run about $4 bucks for three. While this isn’t cheap, it isn’t close to the most expensive soft plastic swimbait out there either. The durability of the DD is a little less than average mostly due to the narrow section of plastic just in front of the tail. It can be torn and was the weak link in our testing. However, it is also fairly versatile which comes in handy when you have to make adjustments while you’re on the water.

Optimum Double Diamond Swimmer
Overall Ratingwww.dyerware.comwww.dyerware.comwww.dyerware.comwww.dyerware.comwww.dyerware.com
Unique design deserves a place in your tackle box

See ya’ on the water …

Fishing Man Made Structure Piles On Lake Lanier

When we posted the 2012 FLW Tour schedule a while back, I was understandably excited. After all, the big day is going to be happening in my back yard.

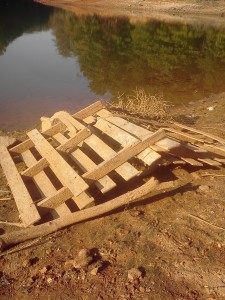
Not long after that article, I took a trip out to Lake Lanier to target some Spotted Bass. Because the water level was so low at the time, I was able to get a few pictures of some things that not a whole lot of people know about. Lake Lanier features man-made structure piles specifically so bass can congregate and ambush their prey.

Obviously, these are going to be fantastic places to fish, as they provide everything a bass would ever need. In fact, if we go back in time a little more than a year, we will see just how productive these little brush piles can be.

The 2010 Forrest Wood Cup

In 2010, Kevin Hawk narrowly qualified for the Forrest Wood Cup. Knowing that the tournament would be held on Lake Lanier, he made a bold move.

He decided to pack his bags, and move to Georgia 9 months ahead of the tournament so he could practice all day every day. He found a place for rent on Craigslist, threw everything he could in his truck and boat, and made the 2,500 mile drive across country.

He still fished on the FLW Tour during this time, but did so as a co-angler. All told, he was fishing 4-5 days a week on Lanier, specifically searching out these man-made brush piles. And it payed off!

On the final day, when his closest competitors barely cracked double digit bags, Hawk weighed in 14lbs. 13 oz.

His strategy was to run and gun from brush pile to brush pile—spending no more than 7 minutes at a spot.

The Lake Lanier Brush Piles

By now, you are probably curious as to what these brush piles look like. Check out the picture on the right. I was able to get this photo

There are a ton of these in Lake Lanier

because the lake levels were down on a recent trip.

Of course, they don’t all look this way, but most of them are intentionally placed in such a way as to create a perfect place for bass to hide, live, and ambush their prey. They will also attract a lot of sunfish, which the bigger bass will eat just as happily as they will a blue-back herring.

When Kevin Hawk moved from California to Georgia in preparation for the Cup, we new about these piles. He spent months and months, and hours and hours on the water finding as many of these as he could find.

He was the only angler on the water following this strategy—a strategy he developed from months and months of dedicated practice.

It is safe to say that as much research goes into being a successful angler as anything else. These aren’t just a bunch of guys drinking beers and fishing all day—they are dedicated to the sport, and they work hard to get the success they have.

Other Man Made Brush Piles

Guess what? Lake Sidney Lanier is not the only lake in the world that features these types of man-made structures. Lots of lakes, maybe some you’ve fished time and again, have this kind of structure.

For as long as people have been fishing, there have been a group of people trying to preserve fishing for the next generation, and helping mother nature help anglers is a good way to do that.

Do a Google search of your favorite lake. Look for anything you can find. Search for man-made structure, or anything else that is published that would help fish hold, and attack their prey.

When I did this, I found the Blueridge Resevoir (one of my favorite local smallmouth fisheries) had at least 20 man-made structures consisting of large plastic tubing and other items. They are like jungle gyms for fish!

Finding these in your local lake, whether you fish in tournaments or not, will help you have a lot more fun on the water, and catch a ton more fish!


Gambler Buzzin’ Cane Toad

We all know about frogs for summer bassin’ but there are still lots of folks who haven’t taken the plunge and given the newest generation

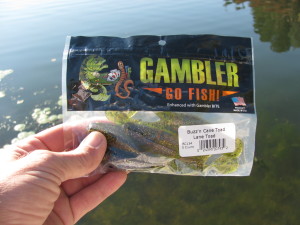
Cane Toad Packaging

of soft plastic buzzin’ frogs a shot. Earlier in the year we reviewed the Attraxx Mystic Frog and we’re pleased with its performance. Since then, we acquired another frog that is very similar in design and application to that, the Gambler Buzzin Cane Toad.

This bait is 4.5 inches long with two buzzin’ legs and a very similar canoe shaped underside. The colors are limited but well thought out. The product is consistent from one color to the next in terms of size, weight and structural features.

The biggest concern with baits of this style is how fast or slow they can be fished while staying on the surface with the legs kicking. The Gambler does a very good job of allowing the angler to use it for a variety of speeds, even pausing to allow the bait to sink when running it over an open hole in grass mats. The weight of the bait allows for good distance when rigged with nothing other than a 4/0 EWG on both casting and spinning gear. This can be a critical factor when choosing a bait of this style.

Another advantage to the Buzzin Cane Toad is that it is excellent when it comes to maintaining its position in the water. Even if it lands upside down, simply starting your retrieve gets the bait right side up in a hurry. In our testing, this toad tracks true as well. Now I suppose if you really wanted to align your hook way off center, you could theoretically make the bait run to one side, but why would you want to? There is no tuning or complex rigging necessary to fish this bait. Just thread it on the hook like you would a worm and you’re ready to go.

Buzzin’ Cane Toad Retrieves And Tips

We’ve fished this bait throughout the summer season, always putting it in harm’s way and have been pleased with the results. You can use a straight retrieve, pop it during your retrieve, allow it to sink and speed it up or slow it down. Generally speaking, we were able to get some fish to strike when we were throwing the Cane Toad. It was all a matter of varying our presentation to suit what the fish were responding too.

Another less utilized retrieve is to rig the Buzzin Toad on a Texas rig. By keeping the bait down at the bottom of the lake, it imitates a frog who is looking to bury itself in the mud. We employed short jerks with longer drags when using it this way. During the spring and early summer, this was an effective way to fish the toad. Just because it’s underwater doesn’t mean the legs quit kicking when it’s moving.

However, our favorite way to fish the Toad was definitely as a top-water bait. Our hook-up ratio when fishing it on top was excellent. Due to the lack of plastic the hook point has to go through and the fact that the fish hit this bait as it was moving, setting on a strike didn’t require swinging for the fences. In about half the hits, the fish set themselves just by taking the bait under.

The toad

This is good bait for novice fisherman to use who are experimenting with top-water as they can throw it for good distance and the retrieves are both uncomplicated and don’t require a high level of skill to master.

The Gambler Buzzin Cane Toad is about $3.50 for a pack of 5 and are better than average in the durability department. This makes them a decent value in today’s market.

Gambler Buzzin' Cane Toad
Overall Ratingwww.dyerware.comwww.dyerware.comwww.dyerware.comwww.dyerware.comwww.dyerware.com
Great price, good action, and above average durability

See ya’ on the water …