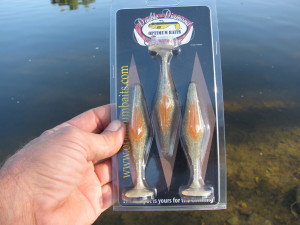
Optimum Double Diamond Swimmer

If you’ve been with us for a while, you know that we always have a swimbait tied on when we hit the water. The reason is simple, they

Optimum Double Diamond

catch fish and can be used in lots of different conditions. We are always open to trying a new product in this category and today’s review is on one that we have been experimenting with for a while, the Optimum Baits Double Diamond Swimmer.

We chose the 3.75 inch version for our testing because it matches the size of our local forage better than the other options. This version also lends itself to more possibilities for rigging than its larger cousins.

The Double Diamond Shape

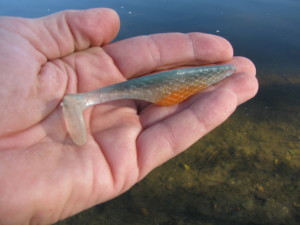
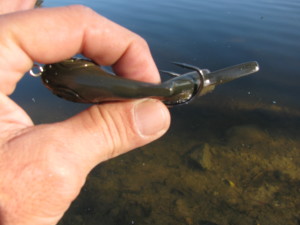
It’s called the Double Diamond because of its shape. Both from the side and top or bottom, it is an elongated diamond with a small head and narrow section just in front of the oversized paddle tail. If you’re looking for 3D eyes, you won’t find them on this bait because the design of the head doesn’t allow space for eyes.

There is a belly slit in the bottom that isn’t as deep as one that is found on a split belly swimbait for aligning your hook whether you are rigging it weightless or using it as a jig trailer. However, because it is relatively shallow, you have more plastic to go through on the hook set than with more traditional swimbaits.

Rigging The Double Diamond

We started by rigging the Optimum on a 4/0 weighted EWG to see how it would cast and what the action would be like. The paddle tail does a good job of moving water but does have a sweet spot in terms of achieving the most kicking action. This bait will stay fairly horizontal on the retrieve without rising in the water column as fast as some of its competitors.

Note the diamond profile

On the fall, the tail stops kicking but it does have a moderate nose down descent with no rolling to the side. We found in fishing the DD that a lot of our strikes occurred as we would snap the bait off the bottom and re-start our retrieve. As far as fishing it by itself, this proved to generate more strikes than any other retrieve we tried.

We also fished it as a trailer on both swim-jigs and chatter-baits. The design of this lure really lends itself to this rigging. Because of the shallow belly slit and fairly solid back, it seems to be more at home when threaded onto one of these baits so that your hook point can be exposed. We also found that it enhances the action of both of these products versus a craw style trailer in terms of the side to side kicking action.

When used like this, we only got strikes as the bait was moving. Not one occurred as the bait was sitting on the bottom. We had our best results by swimming this through stalks and lily pads. When we matched the colors of the Double Diamond to the colors of our jig skirts, we were hit more often than using either a complementary color or opposing colors.

There are a number of patterns available in the Optimum bait. They range from the subtle, more natural, to very dark as well as very bright giving you something that can be fished in almost any color water. Again, knowing the local forage should dictate which patterns you might want to try.

As far as cost goes, the Double Diamond will run about $4 bucks for three. While this isn’t cheap, it isn’t close to the most expensive soft plastic swimbait out there either. The durability of the DD is a little less than average mostly due to the narrow section of plastic just in front of the tail. It can be torn and was the weak link in our testing. However, it is also fairly versatile which comes in handy when you have to make adjustments while you’re on the water.

Optimum Double Diamond Swimmer
Overall Ratingwww.dyerware.comwww.dyerware.comwww.dyerware.comwww.dyerware.comwww.dyerware.com
Unique design deserves a place in your tackle box

See ya’ on the water …

Gambler Buzzin’ Cane Toad

We all know about frogs for summer bassin’ but there are still lots of folks who haven’t taken the plunge and given the newest generation

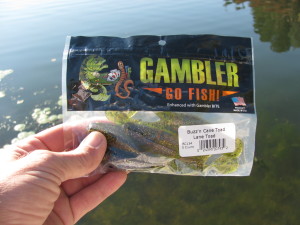
Cane Toad Packaging

of soft plastic buzzin’ frogs a shot. Earlier in the year we reviewed the Attraxx Mystic Frog and we’re pleased with its performance. Since then, we acquired another frog that is very similar in design and application to that, the Gambler Buzzin Cane Toad.

This bait is 4.5 inches long with two buzzin’ legs and a very similar canoe shaped underside. The colors are limited but well thought out. The product is consistent from one color to the next in terms of size, weight and structural features.

The biggest concern with baits of this style is how fast or slow they can be fished while staying on the surface with the legs kicking. The Gambler does a very good job of allowing the angler to use it for a variety of speeds, even pausing to allow the bait to sink when running it over an open hole in grass mats. The weight of the bait allows for good distance when rigged with nothing other than a 4/0 EWG on both casting and spinning gear. This can be a critical factor when choosing a bait of this style.

Another advantage to the Buzzin Cane Toad is that it is excellent when it comes to maintaining its position in the water. Even if it lands upside down, simply starting your retrieve gets the bait right side up in a hurry. In our testing, this toad tracks true as well. Now I suppose if you really wanted to align your hook way off center, you could theoretically make the bait run to one side, but why would you want to? There is no tuning or complex rigging necessary to fish this bait. Just thread it on the hook like you would a worm and you’re ready to go.

Buzzin’ Cane Toad Retrieves And Tips

We’ve fished this bait throughout the summer season, always putting it in harm’s way and have been pleased with the results. You can use a straight retrieve, pop it during your retrieve, allow it to sink and speed it up or slow it down. Generally speaking, we were able to get some fish to strike when we were throwing the Cane Toad. It was all a matter of varying our presentation to suit what the fish were responding too.

Another less utilized retrieve is to rig the Buzzin Toad on a Texas rig. By keeping the bait down at the bottom of the lake, it imitates a frog who is looking to bury itself in the mud. We employed short jerks with longer drags when using it this way. During the spring and early summer, this was an effective way to fish the toad. Just because it’s underwater doesn’t mean the legs quit kicking when it’s moving.

However, our favorite way to fish the Toad was definitely as a top-water bait. Our hook-up ratio when fishing it on top was excellent. Due to the lack of plastic the hook point has to go through and the fact that the fish hit this bait as it was moving, setting on a strike didn’t require swinging for the fences. In about half the hits, the fish set themselves just by taking the bait under.

The toad

This is good bait for novice fisherman to use who are experimenting with top-water as they can throw it for good distance and the retrieves are both uncomplicated and don’t require a high level of skill to master.

The Gambler Buzzin Cane Toad is about $3.50 for a pack of 5 and are better than average in the durability department. This makes them a decent value in today’s market.

Gambler Buzzin' Cane Toad
Overall Ratingwww.dyerware.comwww.dyerware.comwww.dyerware.comwww.dyerware.comwww.dyerware.com
Great price, good action, and above average durability

See ya’ on the water …

Hag’s Tornado F5

Every once in a while, a bait that we have been using for some time will slip through the cracks without getting reviewed. The Hag’s

Tornado In The Package

Tornado is one such bait. We have been using this worm for the past couple of seasons with very good results on a number of rigging options but haven’t gotten around to doing the write-up—that is until today.

We all have our favorite worms that we tend to use day in day out as well as season in season out. Often, we are reluctant to make a change and when someone finally convinces us to try something a little bit different, what do we instinctively do?

We take a half-dozen casts with it, not really learning how to use the product, and pronounce it a loser. With that, we go right back to what we were throwing, exercising the patience of Job, and may eek out an acceptable day if we’re fortunate just because we’ve caught some fish with it in the past.

Such was the case when I first got the Hag’s Tornado. The fact of the matter was that I simply didn’t know how to fish it nor was I willing to take the time to learn. However, that changed one day when I had a well-planned, very long day on the lake. All my usual prep went into this outing except for one little thing. I forgot to check my supply of worms. Yes, within an hour I had exhausted my almost non-existent supply of my favorite worm and while digging through the tackle box searching for an acceptable alternative, I ran across the Tornado in the F5 version.

Rigging The Hag’s Tornado

I started throwing it on the same rig that I was using at the time which was a simple Texas rig with a 1/8 ounce weight. I have to be honest in that I was never a big fan of baits with all the ribs on them. This worm has some serious ribbing! But I didn’t have a choice so I kept using it and started hooking up. Watching the bait in shallow water was an eye-opener in terms of how well the tail floats up off the bottom, as well as how little effort it takes to make that tail quiver.

After a little more experimentation, I gave it a go using a Picasso Shaky Head with a screw type keeper. This seemed to be a marriage made in heaven! This set-up allowed the Tornado to really take advantage of its built in action more than any other rigging option. Every little jerk, rip or pull of the rod tip resulted in some lively action from the Hag’s worm as well as when the jig bumped into anything on the floor of the lake.

Hag’s Tornado Colors And Rattle Chamber

The two colors that I now depend on the most are Tilapia and Storm Chaser with a little Purple Haze thrown in for good measure. I use the F5 more than any of the other size but will use the F4 for drop shotting. These have been the most productive for me due to the fact that I usually fish fairly clear water. However, the Tornado comes in lots of colors including some that I wouldn’t hesitate to try given I were fishing stained to muddy water.

Speaking of the aforementioned conditions, the Tornado has another little feature that is ideal for helping the fish to find it. There is a built in rattle chamber that allows you to insert a worm rattle into the spine of the bait, about an inch from the end of the tail, without tearing the worm. I have taken advantage of this but it does affect the way the worm stands up as opposed to using it plain.

The other two ways that I like to use the Tornado are weightless, just like a senko style bait, and on a wacky head with some weight added to the head of the lure. With these three options, you have several effective presentations that can be made using the Hag’s Tornado.

If you haven’t given any other worm a real chance in a season or more, this is definitely one to put on your short list to give a try.

Hag's Tornado F5
Overall Ratingwww.dyerware.comwww.dyerware.comwww.dyerware.comwww.dyerware.comwww.dyerware.com
Versatile and effective addition to your tackle box

See ya’ on the water …

Power Team Lures Bully Grass Devil

We’ve discussed fall fishing and the baits that we like to use for that time of year. However, there are still a lot of places that are more in

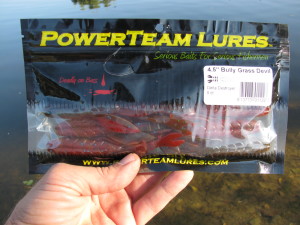
Bully Grass Devil in package

the late summer phase for the moment. For these conditions, there are some baits that will help you put more fish in the boat including the subject of todays review, the Power Team Lures  Bully Grass Devil.

There are situations where you will want to be able to punch through or in the midst of stick-ups, matted grass, lily pads or other dense vegetation. To this end, manufacturers produce what are called, “punch baits”. Typically, these are designed to be smoother, with less appendages sticking out, than a swimming bait.

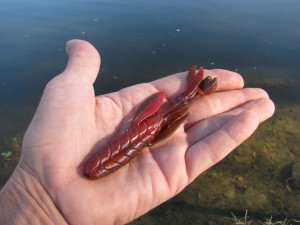
Enter the Bully Grass Devil. This lure is 4.5 inches in length, has a set of claws and a set of extra appendages. Both are designed to be shielded by the body of the bait so that they slide easily through grass but still provide enough action to get noticed by bass who are under all this slop, waiting for an easy meal. This makes an effective tool that mimics a crawfish but doesn’t get hung up as it’s descending through the muck. The strikes usually come on the initial fall or after only a couple of pops of the rod.

Fishing punch baits is not like using the average craw imitation on a jig in open water or with only sparse cover. You want a punch bait to penetrate the cover easily to elicit a reaction strike. For this technique, you’ll want a pretty heavy sinker, 3/4 ounce or heavier depending on the conditions, and I prefer to peg the sinker. I don’t want my weight to have any distance from the bait itself. I usually fish this rig with braid because I am not making a stealthy presentation. On the contrary, I want those fish who are buried in the slop to know that something is coming so they will look for it. I also want a quick drop so that they aren’t analyzing the bait. The idea is that they see it and react quickly to it before it has a chance to get away.

The Power Team Lures Bully Grass Devil accomplishes all of this in an attractive and effective package. I like to use a heavy flippin hook with these baits as there is a groove molded into the plastic that is ideal for tex-posing a hook without having to worry to much about it slipping out. It also provides less plastic for the hook to go through on the set which increases your hook-up percentage.

There are several good colors offered with many of them using two colors. One of my favorites is the Delta Destroyer that is kind of dark brown on one side and a deep red on the other. This matches our local mud-bugs to a T. When you’re shopping for a lure like this, matching the hatch is an important ingredient to your success. Remember, you’re goal is to make the presentation such that your bait doesn’t arouse any suspicion from the fish.

A lot of folks don’t have access to a boat but don’t let that stop you from adding this technique to your arsenal. You can use this from shore simply by casting into holes in cover and allowing the bait to drop to the bottom. From there, just pop it quickly off the bottom and hold on!

On the MVF rating scale, the Power Team Lure Bully Grass Devil earns a 3.75.

See ya’ on the water …

The bully grass devil has a very creative design

Picasso Shad Walker

When we got done with our review of the Culprit Ultimate Topwater Shad, one of the things that “the Kid” and I discussed was the fact

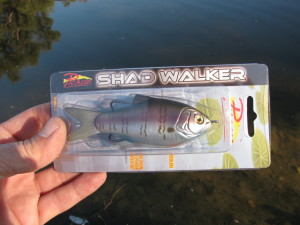
Shad Walker In Package

that this style of bait was going to generate some more entrants because it addressed a new niche market. Sure enough, Picasso Lures has come out with the Shad Walker.

This is a similarly styled bait but uses a more realistic body profile and colors. This bait is slightly longer at 4 inches but weighs the same as the Culprit at .5 ounces. Of course we had to get some of these and see how they performed considering we still have the opportunity to catch some fish on top-water lures and there is still plenty of lily pads, matted grass and other inviting areas to throw a bait like this.

So out to the lake we go, the Shad Walker tied on a frog rod with braided line, looking forward to putting the Picasso through its paces. Sure enough, the bait casts just the way you would expect it to. Due to its size and weight, you can get good distance on your casts but not great.

Know this going in and you will position yourself properly to your target. We always like to use lures right out of the package without making any modifications to them, at least initially. That way we experience them the way they were designed to be thrown and can assess the strengths and weaknesses as they are from the factory.

The hooks are sharp out of the box but have a little bit of distance between themselves and the body of the bait. This could be to facilitate good hook-ups but it also makes this bait a little less weedless. You can indeed pick up slop which we found out first hand. However, we didn’t get any snags to speak of. We were a little bit cautious not to throw this bait in the middle of stick-ups. I think this is the one area that we had any misgivings casting the Shad Walker. On top of pads, grass or other floating gunk, there wasn’t a problem as the bait does a very good job of landing in the right position.

Top View

Where the Picasso seemed most at home were areas that had weeds growing to the surface but still had pockets of some open water interspersed. The Shad Walker is very easy to walk-the-dog and probably comes closer to a spook type action than any soft-plastic, double hooked bait that we have fished to date. This was a pleasant surprise and made fishing with this lure just plain fun.

We fished the Walker side by side against our favorite frogs to see if the fish would prefer one over the other. Our experiences so far have been positive in that the fish seems to prefer this bait over a frog in open water with it coming in a close second when fished over slop. Our hook-up ratio has been fairly consistent since we’ve been using this bait at just about 75%. I don’t consider that bad at all for a lure of this style.

Does all this mean that I’m gonna’ give away all my frogs? Absolutely not. But it does mean that I have another tool that I will be using on a regular basis when the fish are unwilling to hit a frog and I need to fish in the same area.

Picasso Shad Walker
Overall Ratingwww.dyerware.comwww.dyerware.comwww.dyerware.comwww.dyerware.comwww.dyerware.com
Fantastic bait that needs to be in your tackle box

See ya’ on the water …

Top Baits For Autumn Bass Fishing

Here we are at the beginning of October with the dog days of summer quickly coming to an end but bringing with it one of my favorite times of the year. Yes, I’m gonna’ have to stop fishing at night which is, for me, a real bummer.

But at the same time, this time of the year is one of my absolute favorites! The approaching fall means that the bass are going to start really feeding heavily in preparation for the winter. This is either going on now or will start very soon no matter where you fish. Furthermore, you should be able to catch them fairly easily from shore or a boat.

In my opinion, no angler should allow this season to go by without spending a substantial amount of time on the water because you stand a very good chance of not only catching some big fish but hefty numbers as well.

Time To Speed Up

To target these fish, you’ll need to think in terms of putting away those slow moving baits in favor of faster presentations. A great place to start will be with some shallow running cranks like the Strike King KVD 1.5 and 2.5. The Spro Little John is another awesome bait for plying the skinny water. These are a couple of my go to lures for shallow crankin’.

I also like to get out the River2Sea tandem of the Crystal Buzz and Crystal Spin. I work both of these baits moderate to fast in areas around vegetation and on long points and flats. This is where you will have bass chasing schools of shad and when they get into a feeding frenzy, they don’t usually take the time to scrutinize a bait before they crush it! Yeah buddy, this can be some kind of fun!

Soft Plastics And Jigs

I always have a soft-plastic swim bait tied on like the Netbait BK swimbait. I will use both the 4 and 5 inch depending on what I find when I hit the water. These are particularly productive in weedy areas where some of the other lures might get hung up. I let the fish dictate the retrieve speed. There are even times when burning it produces where nothing else will.

Another alternative is a soft plastic jerk bait. I prefer the Strike King Perfect Plastics Caffiene Shad or the Big Bite Bait Jerk Minnow. I use the 5inch in both and really work these fast. Cast it out, count it down then double time it back to you! When you get a strike on these baits, it can be absolutely bone jarring!

Swim jigs are another great option for this time of year. I have a lot of confidence in the Dirty Jigs California Swim Jig and their Finesse Swim Jig. I use either single tail grubs or small swimbaits as trailers for both and try to match the color of the predominant forage fish. I have caught more fish by using a yo-yo type retrieve while keeping the jig moving. Here again, I like to allow the fish to tell me how fast they want this bait moving.

Top Water

Finally, I love catching them on top-water lures and have my preferences here too. Like that’s a big surprise? I have caught so many fish on the One-Knocker Spook that it is always in the front of the tackle box. The Spook has also accounted for some of my biggest fish in early fall. The Rapala Skitter Pop presents a different look and sound that consistently puts fish on your thumb.

Buzzin frogs certainly have their place and are fun to catch bass on. The Attrax Mystic Frog and the Gambler Buzzin Frog have been the most productive baits for me in this class. They offer an easy to fish alternative that is downright fun.

Speaking of frogs, I wouldn’t be without my hollow belly frog baits. I prefer the Strike King Sexy Frog and the Koppers Live Target Hollow Belly Frog. Between the two, I use them over matted vegetation and in open water. Yes, you can use heavy mono to fish these baits but braid has been my choice for throwing these lures.

This is also a great time of year to take newer anglers and kids out to the lake. They have the opportunity to catch numbers of fish who simply aren’t going to be as selective as they can be at other times. Yes, this is a great time to do some fishing and the more frequent, the better for the next several weeks.

See ya’ on the water …

FLW 2012 Tour Schedule

The FLW tour schedule has been released and we wanted to give ya’ll the heads up on these events so that if you’re anywhere close, you can start making plans to witness some of them first hand. If you’ve never attended one of these tourneys, put this on your bucket list! They are something to see. The anglers are friendly, enjoy interacting with the fans and you have the opportunity to learn more than you can imagine when you’re there. So without any further ado, here is the complete schedule.

  • The FLW Tour Majors will open on Lake Hartwell in Greenville/Anderson S.C. March 8-11 for the 2012 season.
  • Next stop will be Table Rock Lake in Branson, Mo. March 29 – April 1.
  • From there, the Tour swings into Rogers, Ark. for the event on Beaver Lake.
  • May 17-20 the pro’s will have a go at the Potomac river out of National Harbor, Md.
  • Famed Kentucky Lake out of Murray/ Gilbertsville, Ky. is set to host the fifth stop June 7-10.
  • Later that month, June 28 – July 1, Lake Champlain, out of Plattsburgh N.Y., will be the scene for the final event before the battle for the cup.
  • As it was in 2010, Lake Lanier out of Duluth/Gainesville, Ga., is the sight chosen for the 2012 Forrest Wood Cup.

There are also four opens on the schedule with one in February, the 9-12 on Lake Okeechobee out of Clewiston, Fla. The Detroit River out of Detroit, Mich., August 23-26, Lake Wheeler out of Decatur, Ala., Sept. 20-23, and the final open on Sam Rayburn Reservoir out of Lufkin, Texas October 11-14.

This 10 month schedule of fishing different types of water at various times of the year should make for some very interesting tournaments. The FLW pro’s aren’t going to have the luxury of relying on just a handful of baits and techniques given they want to be consistent throughout the year. The adjustments that they are going to have to make and various skills that they will need to master will be showcased as they go through the events. Man am I looking forward to seeing all of it!

See ya’ on the water …

Tbyo Koeki Terminal Tackle

We don’t often talk about the specialized tackle that is used to target toothy critters of both the fresh and salt-water varieties but we

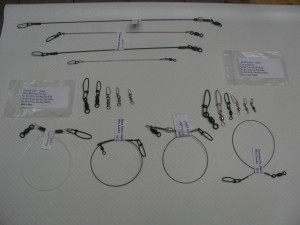
Tbyo Koeki offers well constructed high quality products

recently found a company with some amazing products. Tbyo Koeki Co. out of Japan, is one of those who are making inroads by producing high quality products aimed at the needs of those anglers who relish catching these swimming mouths full of needles.

They produce tackle in test pound ratings that range from around 30 all the way up to 300 and then some. They feature a variety of materials including nylon coated wire leaders, heavy fluorocarbon leaders and solid titanium leaders, all with double-lock snaps and ball bearing swivels in a dizzying array of lengths to match your needs.

The Salt Water Test

We had a friend do a salt water test for us. We needed an expert to take the equipment through its paces in the ocean. After taking this out on a seven-day trip, in which he was fishing for everything from Tuna to Kings and in-between, he came back very pleased with the performance of this gear. During his trip, he didn’t see a single failure in the construction of the leaders either where the snaps are attached or where the swivels are attached on the other end.

Through repeated strikes and fights, the wire held its shape as did the other components in all the test pound classes and tying to the leaders, according to him, was a breeze.  To top it off, getting back took some real horse-trading.

The Workshop Test

With that information, we decided to give the destruction of these items a go utilizing some unusual methods. First up, the saw that comes standard on most Leatherman type tools.

Hey, when you’re dealing with titanium that is designed to stand up to rows of sharp teeth, why not? We put the leaders in a vice, got out the stop watch, and went to work! Yes, we were able to, with a great deal of effort and more time than we had anticipated, cut through the material. But that was focused pressure on one specific spot on the material. Would a fish be able to do that? I don’t think so, at least not to the degree we were!

After that I figured why not get out the heavy artillery in the form of wire cutters and see how they would stand up to that kind of abuse. Once again, I was able to achieve my objective of destroying the material but only with a lot more effort than I expected.

The bottom line is that the Tbyo Koeki terminal tackle is everything that it is advertised to be and then some. I do know that this will be my tackle of choice for pike, musky or any other water wolves. If you like fishing for these types of fish, or, if you do any salt-water fishing for fish with big nasty teeth, this equipment will not fail you.

See ya’ on the water …

How To Tie A Drop Shot Rig

The other day I went to a local tackle shop to pick up some drop shot hooks. While I was there, one of the employees started asking me about the drop-shot rig and how specifically to tie it. It seems as though he was having problems when he was tying the hook to the line and just couldn’t get the hook to stay in a right-angle position on his line.

He was pretty sure that this was the cause of his lack of success with this rig and wondered if I had some secret that might help him. I asked him what knot he was using and when he told me, it was clear that he just wasn’t using the right one.

With that in mind, I figured that I would go over specifically how to tie a drop-shot rig. I’m sure that some of you are aware that there are several companies who will soon be releasing entire systems for drop-shotting that are designed to make tying easier as well as address the main drawback to the technique which is line twist. We will be reviewing these in depth when we get them and use them for a period of time but for now, let’s look at the traditional way to tie this rig.

To begin with, I only use spinning tackle and relatively light line, 4 – 6 pound test. For hooks I prefer Gamakatsu Drop/Split Shot Hooks. These are light wire, penetrate quickly and easily and are sturdier than you would think by looking at them.

The most important part of the rig is the knot that you use to tie the hook onto the main line. This is what will keep the hook, and

Notice The Loop

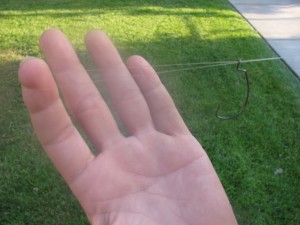
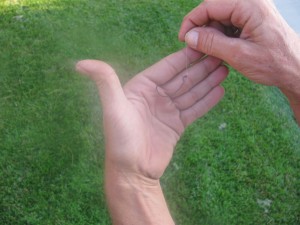
therefore, the bait in that horizontal position while in the water. We always use an overhand Palomar knot. To tie this you go up your main line about 18 inches, pinch the line together so that it is doubled then thread it through the hook eye.

Making sure you always have that same doubled over line to work with, now tie a simple granny knot in the line. Moisten the line and begin to cinch it down without tightening it all the way. Now take the loop from the granny knot and go over and around the entire hook. Finally, cinch it down completely and your hook will stick out at roughly a right-angle from your line.

Now all you have to do is put a weight on the end of the main line and choose a lure. I prefer the tungsten weights because they are smaller than their lead counterparts which increases sensitivity and is more environmentally friendly. Most of them have a clip on the top so that all you have to do is tie a simple knot at the end of your line, thread it through the wide part of the clip and then pull it up into the apex of the clip. This keeps the weight firmly on the line without much fuss.

Most of the baits that you’ll use with a drop-shot rig are designed to be nose-hooked which doesn’t require any special talents to do successfully. I just like to make sure that I can see at least 60% of the hook, the bait is vertically aligned with the hook and that the gap is not filled completely. I believe these precautions equate to a better hook-up percentage.

So there it is our complete guide to tying the drop-shot rig.

See ya’ on the water …

The Final Rig

One Simple Tip For Catching More Bass On The Shaky Head Worm

We’re going to answer another question today from our readers. This one concerns slowing down your presentation. There seems to be some folks who are finding that, due to limited time on the water, they can’t narrow things down to an approach that will work. This is nothing unusual. I still get the shakes before I take that first cast in anticipation of the first strike of the day. However, I’ve been doing this long enough now to realize that this doesn’t always translate into a more productive day, or several hours, of fishing.

If you’re a baseball fan you know that the best hitters in the game tend to be those who have learned to be patient enough to swing at only the good pitches. You just can’t hit every pitch that is thrown so swinging at all of them will more than likely earn you a strike out as opposed to a hit. So how does this translate to fishing?

Anglers have to learn to approach those lure choices that are designed as finesse techniques with the same patience as a big league hitter.

A case in point is a buddy of mine who fishes almost exclusively with soft plastics. Why? Because he has read that there are more tournaments and money won on the cast for cash circuits with plastics than any other genre of baits. Okay, can’t argue with him there. But, he fishes a shaky-head as fast as I fish a spinner-bait. You can probably guess the outcome of that strategy! He’ll get the occasional bite but when we go head to head, I tend to out catch him 3 to 1.

I’m not bragging, we just fish this rig two completely different ways. The reason for this explanation is that the question I’m attempting to answer is, “How slow should I fish a shaky-head rig?”. This is paraphrasing, but it is the core concern that we’re going to try to shed some light on in this article.

Slow It Down…WAY Down

The short answer is, as slow as you can without allowing rigor-mortis to set in. Given that you have found the fish and the water clarity lends itself to this technique, a shaky-head can be a very effective presentation at this time of year. When I was first learning how to fish this rig, I had to train myself to move my bait inches at a time and then kill it and shake it on semi-slack line before moving it again. This can be tough to master when you’re used to running and gunning.

One of the ways you can practice this before you put it into play is taking your gear out to the back yard. Make a cast across the lawn and see if you can move your bait no more than two inches at a time. Learn how far to move your rod tip to limit the lures movement to just a couple of inches. When you have that perfected, practice moving the lure, then barely shaking it for 10 to 30 seconds before moving it again.

When you have both components of this retrieve, time it beginning from when the lure hits the ground to when it is within a few feet of you. This will give you an idea in real terms of how long one cast and retrieve should take you when you’re on the water. Now all you have to do is to replicate what you’ve already done. This simple process is what it took for me to start catching fish on a regular basis using the shaky-head technique.

I know that this sounds a lot like watching paint dry but it can be extremely effective for sluggish or heavily pressured fish. No, you’re not going to get into the Guinness Book of World Records for most casts in the shortest period of time using this method. But that isn’t the point is it.

You’re doing this because you aren’t catching any fish by moving quickly and realize you’ve got to slow down to get those bites! If you take the time to learn to do this, an added benefit is that this presentation can be used with more than just a shaky-head. It translates well to a whole host of other baits and techniques like drop-shotting and dragging.

Let us know how you’re doing with this. We enjoy hearing the follow-up.

See ya’ on the water …